
Create your WordPress website without coding in 15 minutes
Setting up a WordPress website is becoming more and more like opening a Facebook account; but people still fear this process, and find it more difficult than it actually is.
But fear not! I’m going to show you how to create a WordPress website in 15 minutes! Without having to know how to code.
Many designers think that setting up a website is hard, because the only experience they have with this is probably from older platforms or what they have seen in movies. You can probably imagine a tech-guy endlessly typing on a keyboard while lines and lines of code appear and disappear right before his eyes.
In reality, this process is much more about clicking in the right place and at the right time.
The easiest type of website you can set up is actually what most people and smaller businesses need and that is a blog developed on WordPress. This platform is actually a content management system that can be used for building great, interactive and extremely complex sites, but it will work just as well for creating simple blogs that you and I can use.
I setup a WordPress website each time I want to test a new idea, start a new blog for myself or for my clients. But WordPress doesn’t have to be used as a blog, you can create simple or complicated websites with it. Hey, even the nuSchool blog you’re now reading is built with WordPress!
What is even more surprising, is that setting up a WordPress website doesn’t have to be expensive. I’ll show you the cheapest way to do that. The exact same way I’m using it for my clients who want a WordPress website.
By the end of this post, you’ll have your first WordPress website setup, and you’ll even publish your first blog post.
But first let me simply explain what we’re about to do :
Your website needs to be hosted on a server. A hosting-server is a powerful computer, designed to host… well.. right – websites! So in Part 1 we will setup a hosting account for you (5 mins).
In order to create a website without coding, we will use the WordPress platform. In part 2 I’ll show you how to install a WordPress website on your hosting account. (5 mins).
Lastly, In part 3 I will teach you how to customize your wordpress website and create your first post. (5 more mins).
So grab your credit card (don’t worry, it’s going to be as cheap as $3.95 per month), and clear the next 15 minutes or so.
Ready? Let’s do this.
Part 1 : Set Up Your Web Hosting Account
There are so many hosting companies out there that only naming them would take us forever, and they range from exceptionally good to downright awful. Most of them are so complicated to use that you would be better off trying to create a rocket and fly yourself to the moon.
It is important to find a hosting company that offers the best combination of features at a decent price and will not try to limit you in any way. Read the fine print, and pay special attention to things that are not mentioned, and do not trust the words like unlimited – nothing is truly unlimited, and nothing is truly free.
Step 1: Find a Good Hosting Company
For our own needs, we have selected Bluehost services, which are officially recommended by WordPress(!). They have a super easy-to-use admin panel and excellent customer support. As you’ll see later, installing a WordPress website on Bluehost is a matter of a few clicks. No code needed!
It is important to choose the right web host, simply because you will be able to create as many domains and subdomains as you want, meaning that on a single Bluehost account, you can have as many WordPress accounts as you want (for the same price). Furthermore, you will not have to bother yourself with backing up your websites because they do that for you.
I have been using Bluehost for years now (since it’s so inexpensive and reliable) so I created this guide with them. Even if you wish to choose a different hosting company, you should still go over this guide to get the general idea. (Not every hosting company lets you install WordPress in 5 minutes, but I’m sure some of them do).
Step 2: Sign Up with Bluehost
To get started with Bluehost, head over to their Sign Up page where you need to select an account plan from the three that are available for new users; each plan is designed for different needs and desires. I would start with the cheapest one. It’s usually $5.99, but now, for a limited time, Bluehost is offering a special for the nuSchool readers for only $3.95 a month.
They also have a 30-day money-back guarantee, which I used once for a client that decided to terminate the project before I even finished the work. These things happen.
Step 3: Register a Domain Name
After you’ve selected the desired plan, you need to choose a domain name (you know, that awesome name you’ll give your website, like: “www.WhyILikeCats.com”). It is important to choose a good domain name, especially if you do not already own one, since that will be your professional business card from then on. Note: you will get a free domain registration with the hosting purchase.
If you want, you can even transfer a domain that you already have, and Bluehost will give you all the information on how to direct it to your new one.

If a domain name you truly want is already taken, you can try and rearrange some of the words in order to find a combination that is available but still simple and catchy.
Purchasing the domain is extremely easy and it even comes free when you buy an account. You will need to fill out a few more forms, such as your personal data, and your payment info.
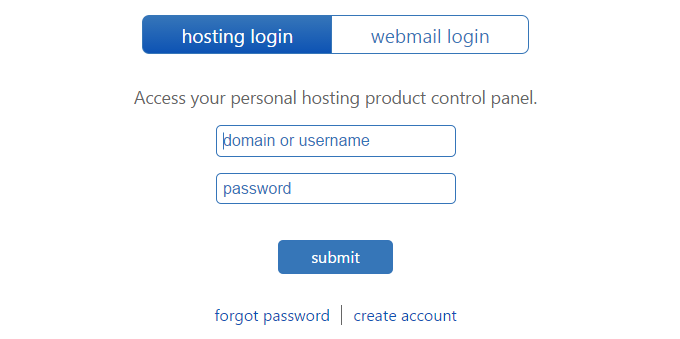
Once you’ve confirmed everything, you can then go to the login page.
Step 4: WordPress Installation
Once you’ve logged in, you will see Bluehost Home page.
You will need to click on cPanel (admin panel) where you will see all the tools that you can use to further adjust your website, even to the smallest details.
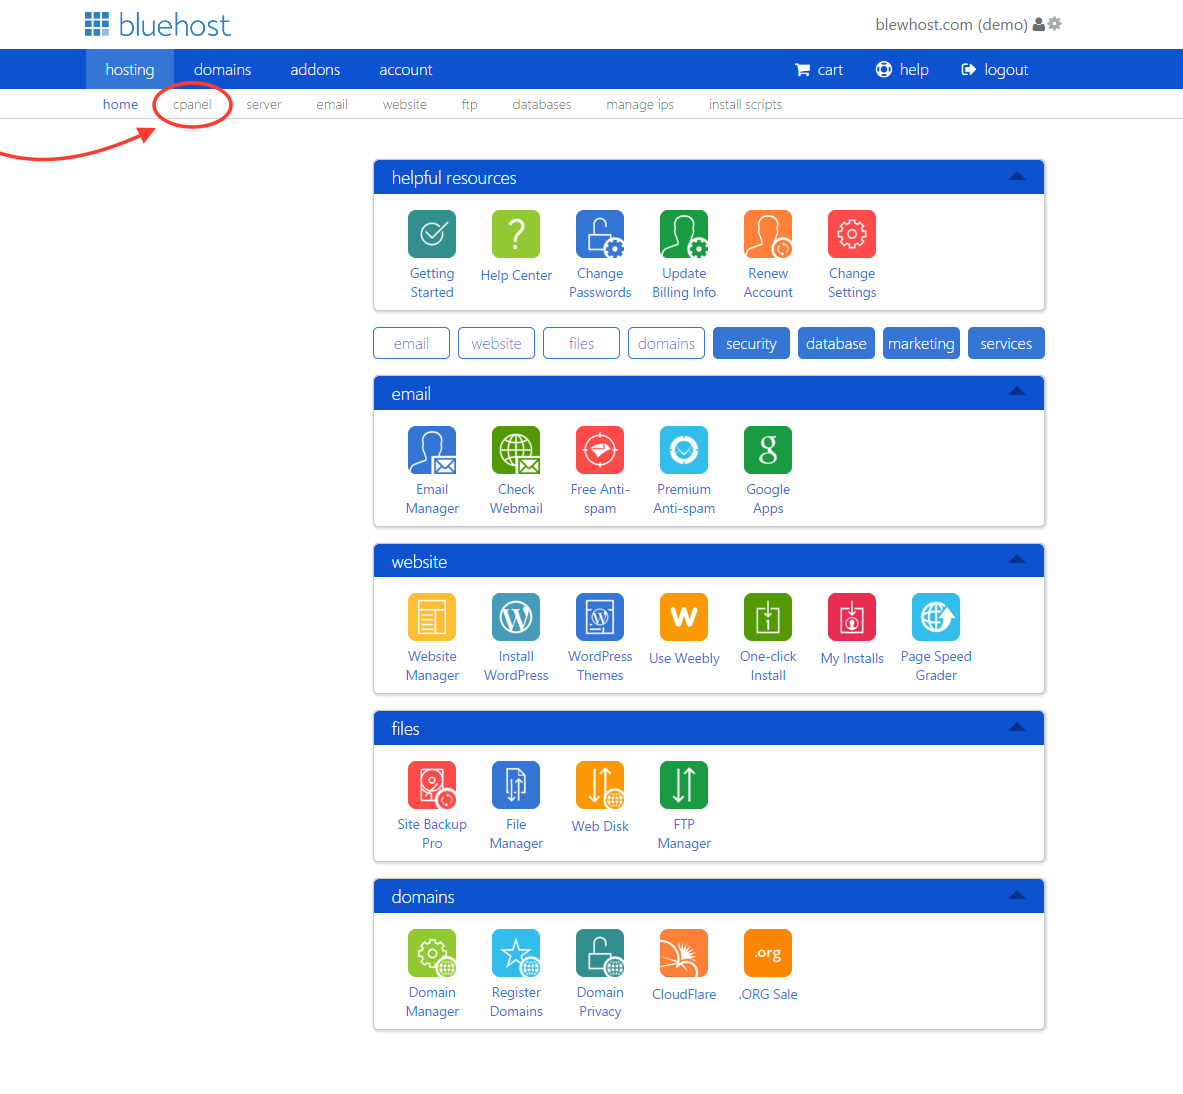
Most of these settings are already set up by default, so there is no need to touch anything you are not familiar with.
Now let’s have your WordPress up and ready in the next 5 minutes!
Part 2 – WordPress Installation
Log in to your Bluehost Home page, and find Website section and click on Install WordPress.
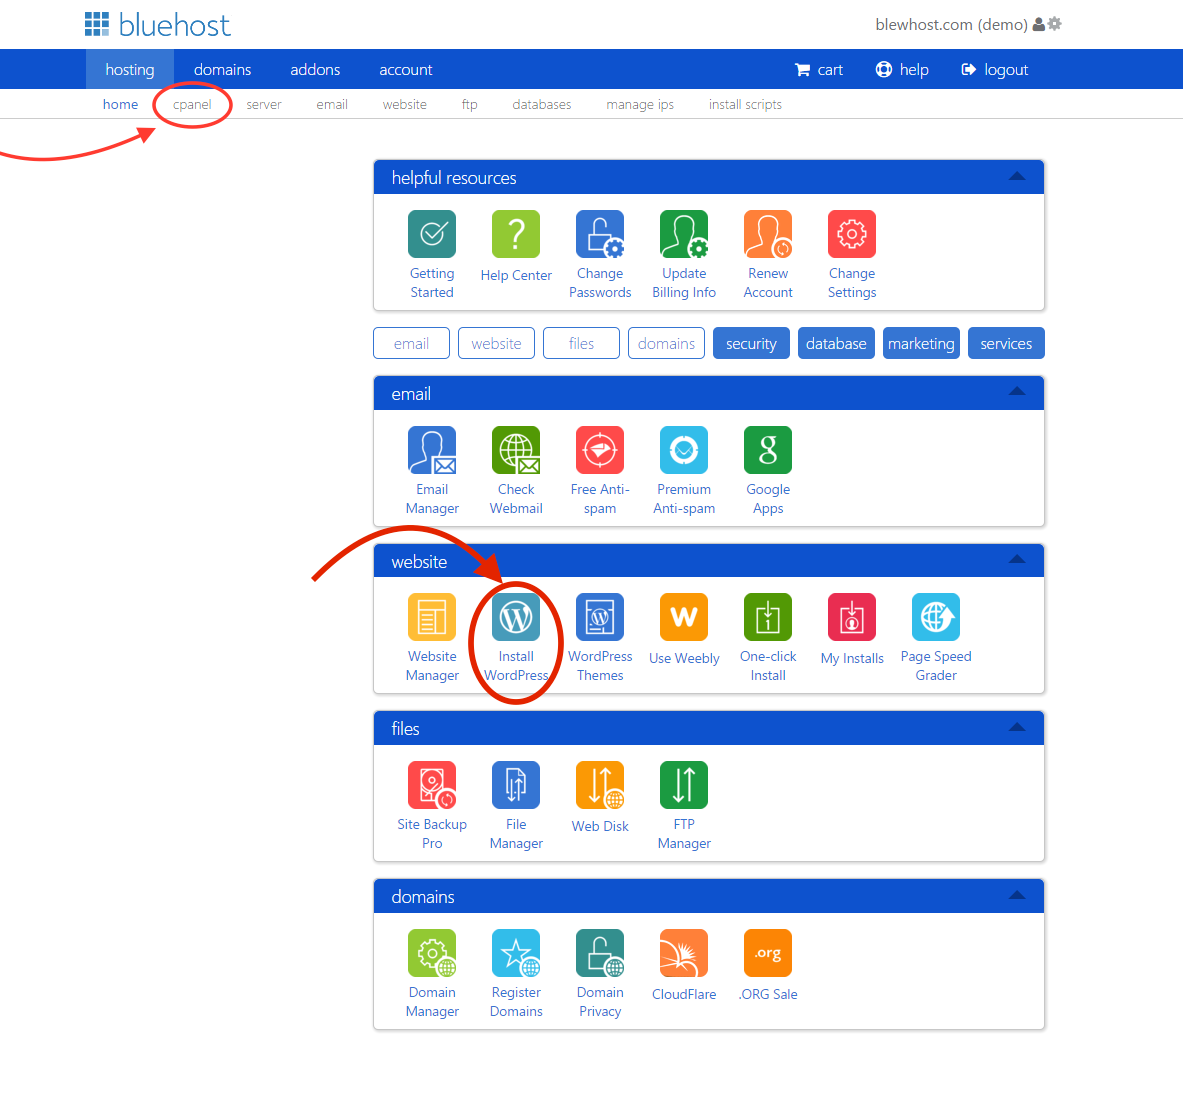
This is a one-click installer tool.
Now, click on the green Install New Scripts button.
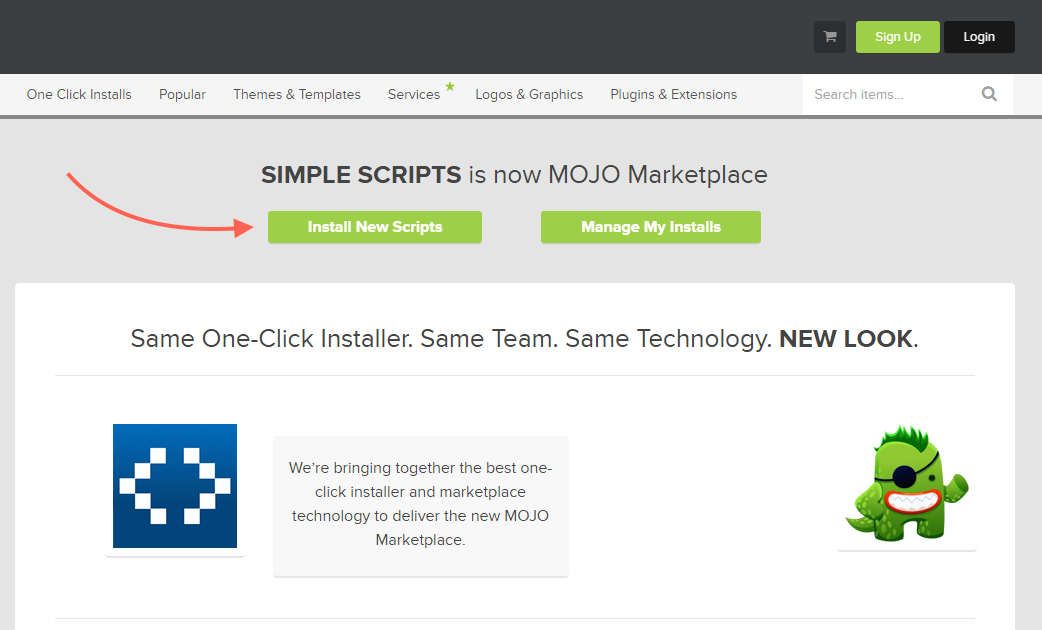
You will need to select WordPress, which is the first icon available.
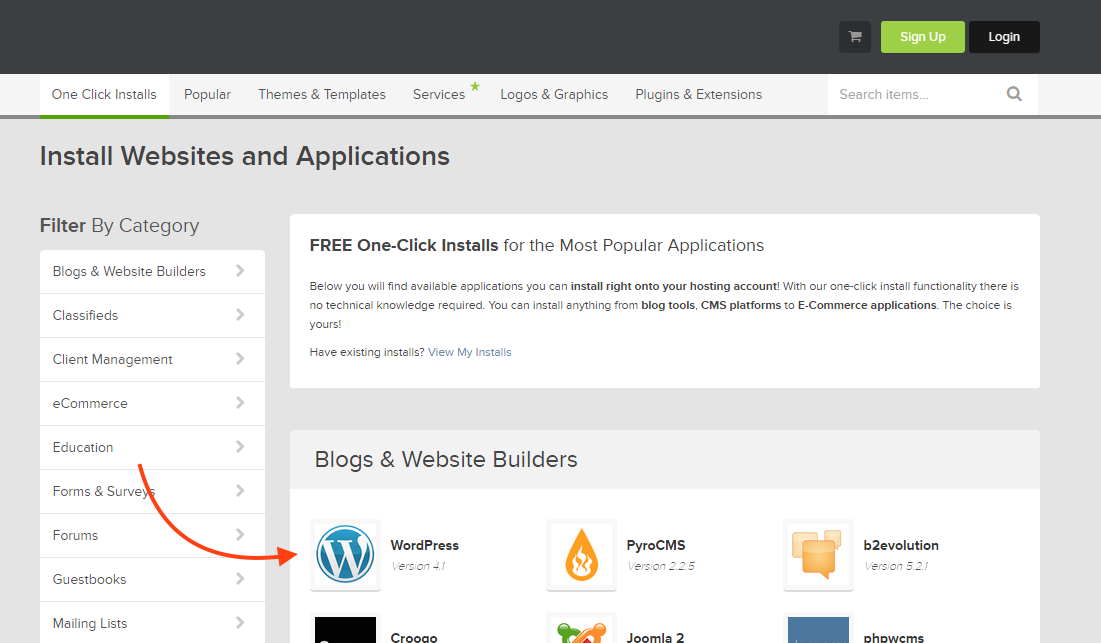
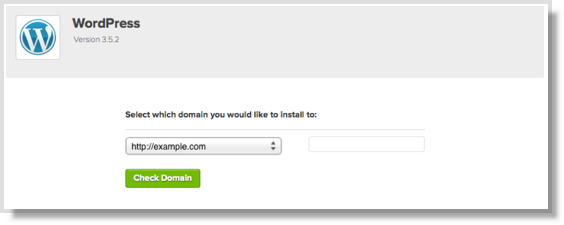
After that, click that you have read the terms and conditions, and this will start the installation, which lasts only a couple of seconds. Select the domain which you want WordPress to be installed to.
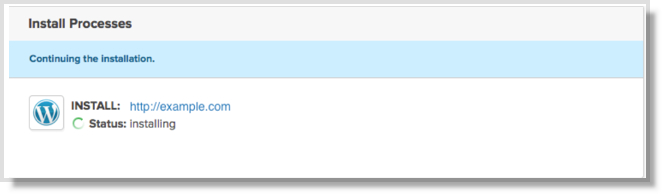
After that is finished, it will present you with your website’s URL address, WordPress control panel URL in the form of YourDomain.com/wp-admin (replace “YourDomain” with your domain), which you must use in order to access your WordPress Control Panel, as well as your WordPress username and WordPress password.
Ta-da! You have a WordPress website installed!
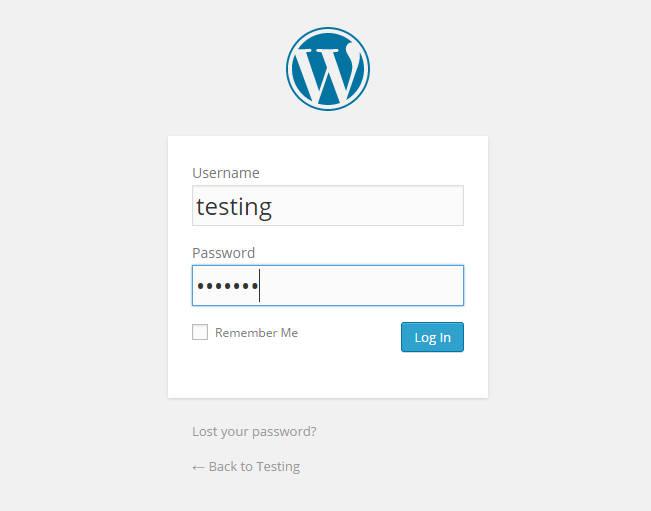
You can visit YourDomain.com/wp-admin (again, replace “YourDomain” with your domain) and there you will be presented with a WordPress login screen in order to access your website’s Control Panel.
Part 3 : Final WordPress Settings
Now let’s customize your WordPress website and publish your first blog post!
Once you have installed WordPress successfully, you now have YourDomain.com, which has some default theme setup, and it probably doesn’t look the way want it look. Let’s try to make it a bit nicer.
You already have a username and password, so now you can visit YourDomain.com/wp-admin in order to access a login screen where you can adjust the WordPress settings.
Step 1: Log In and Access Control Panel
Log in with your WordPress username and password, and you will find yourself looking at the WordPress Dashboard; this is just a cool name for “control panel”. (This is commonly referred to as the back-end, and the front end is actually what your visitors will see.) Here we can start accessing some more settings and options.

Step 2: Delete all Generic Stuff
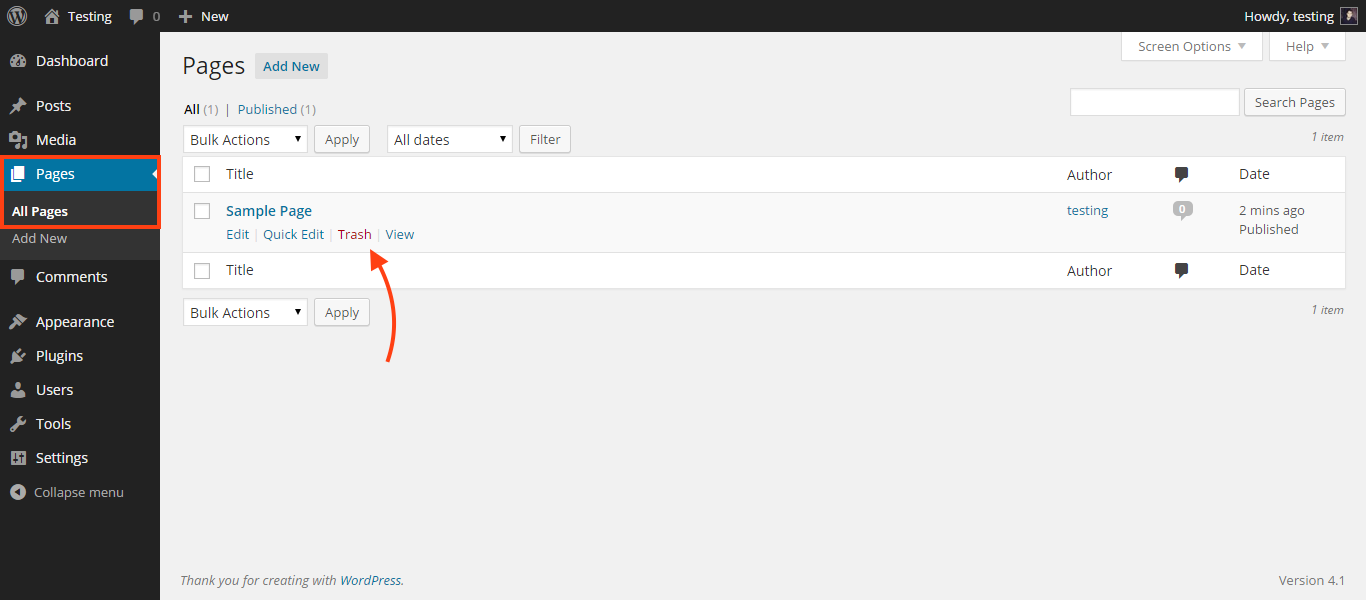
Now that you have entered the Dashboard, you will find that it is full of dummy content, which is actually just there to let you know that everything is working as intended. Feel free to go to Pages Tab that is located on the left side, and access All Pages.
Delete everything. Do this by simply hovering over pages and clicking the red button Trash. This will move all the items to trash, making sure that there are no posts left behind.
In Posts, you should find a Hello World post, which is a nice little greeting that WordPress has prepared for you. Too bad it has to go. Delete everything that was placed there before starting to create your own content.
Step 3: Access the General Settings
On the left side, find Settings tab and click on it.
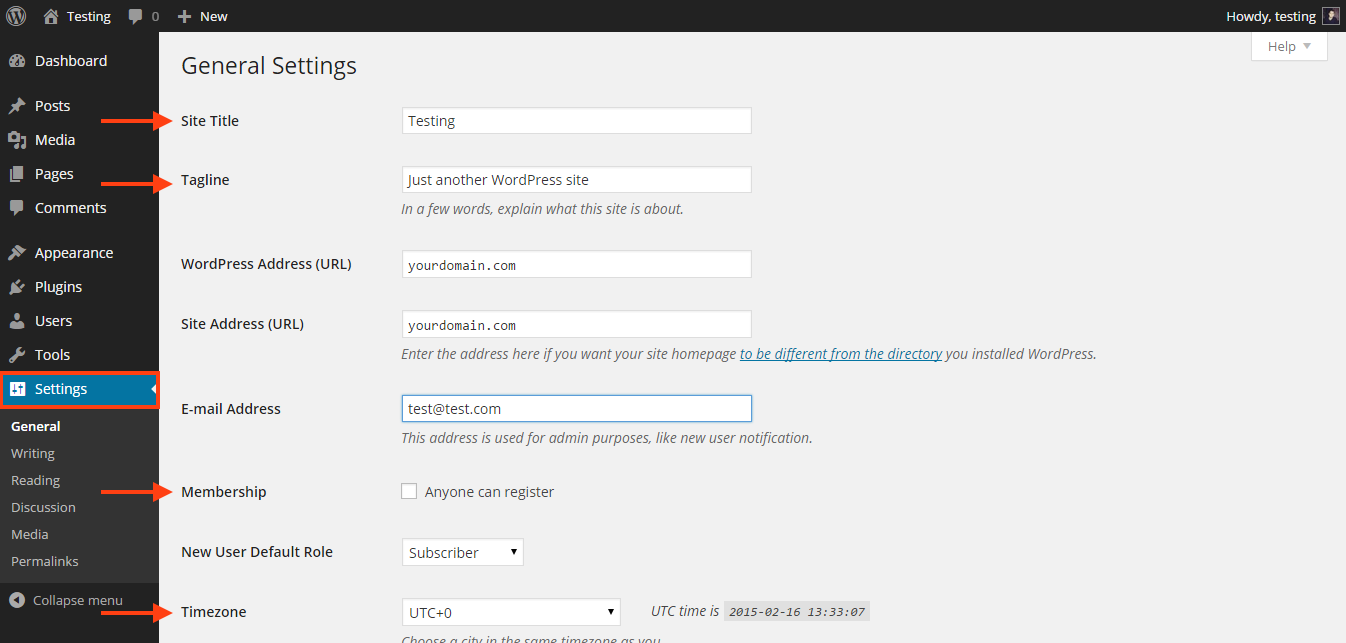
You will need to create a Site Title which will appear as the name of your website, and a Tagline – your motto, or something that will further describe your website. You should also select your Timezone.
Step 4: Set up WordPress Permalink
Permalink is actually how WordPress will name new pages and posts that you create.
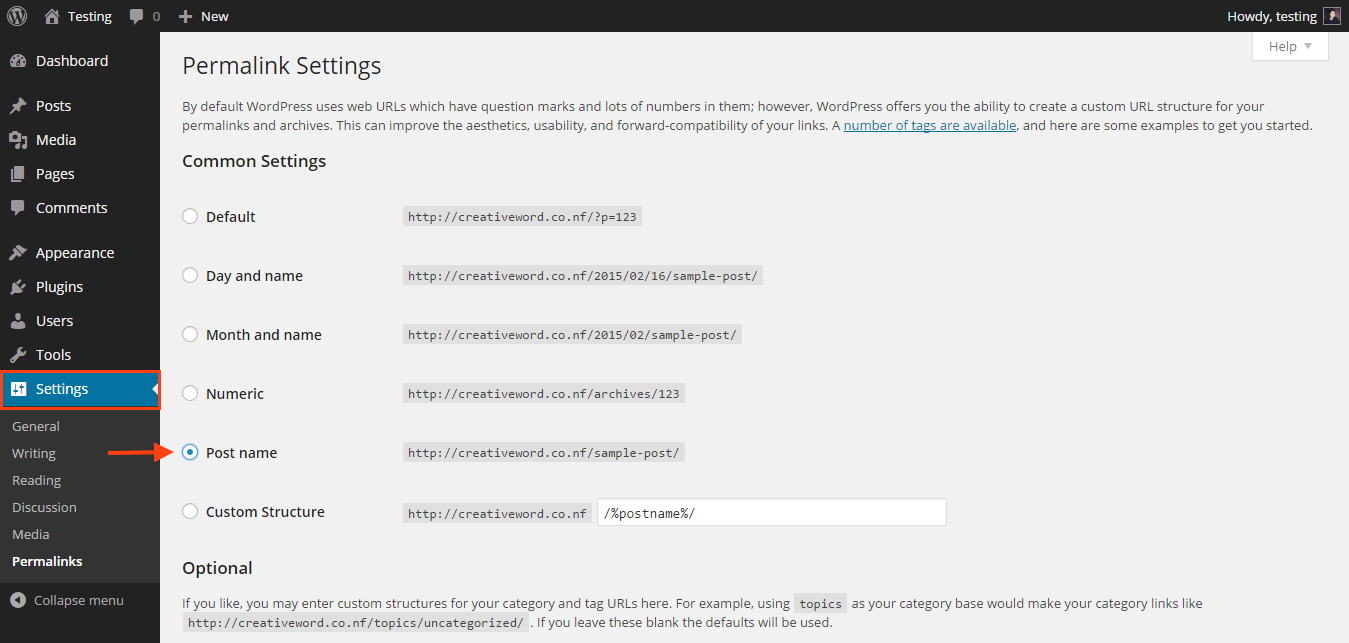
If you want to make it more friendly for search engines (more commonly known as SEO), go to Settings tab on the left side of the dashboard and then to Permalinks where you will need to select Post name, meaning that when you create a Sample Post, it will appear as YourDomain.com/Sample-Post and not as YourDomain.com/?p=12345. This will make sure that search engines know what this page is about without having to dig for more information.
Step 5: Manage Appearance
Once this is done, you can improve the appearance of your website. Click on the Appearance tab on the left. It will open up and show you all the themes that are already installed.

You can buy other themes and install them by clicking the Add New button at the top of the page. Feel free to experiment and select the theme that you want. If you want to change something, make sure to find the instruction manual that comes with a particular theme, but most of the time, themes will already have everything set up, and no matter how many posts or pages you have, they will arrange them in a most efficient way.
Themes can cost anything between free to a few hundred dollars. In most of them you can play with fonts, arrangement, footer, etc. Try to play with the free ones to get a feel for it.
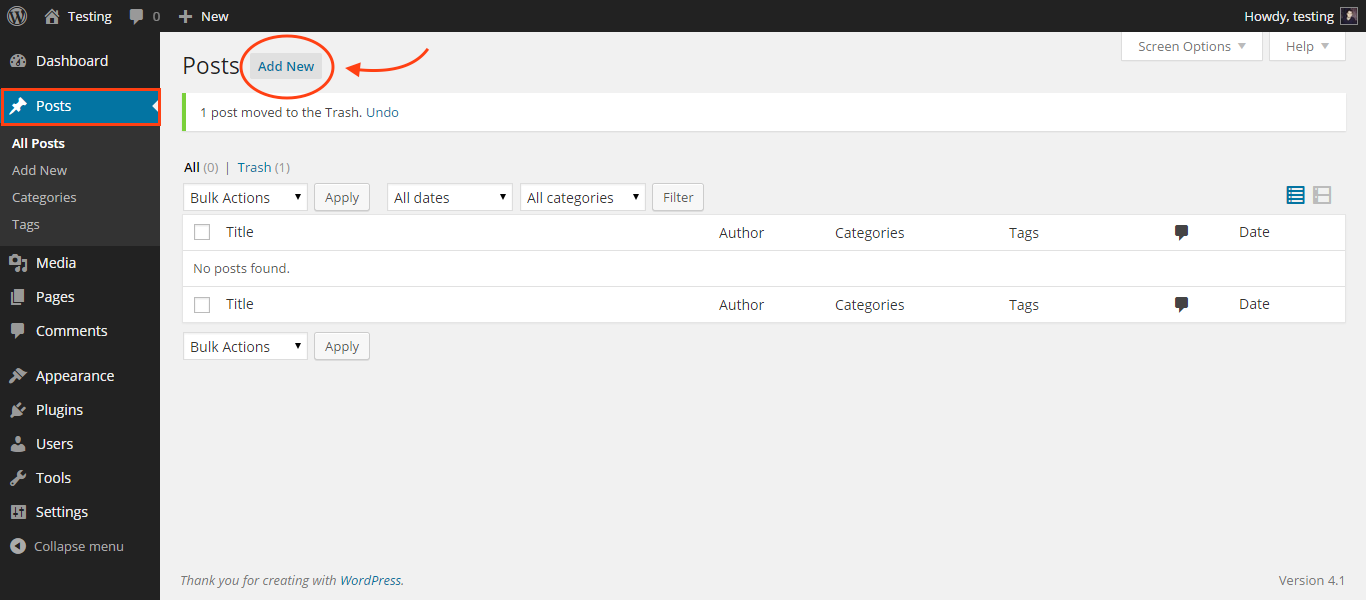
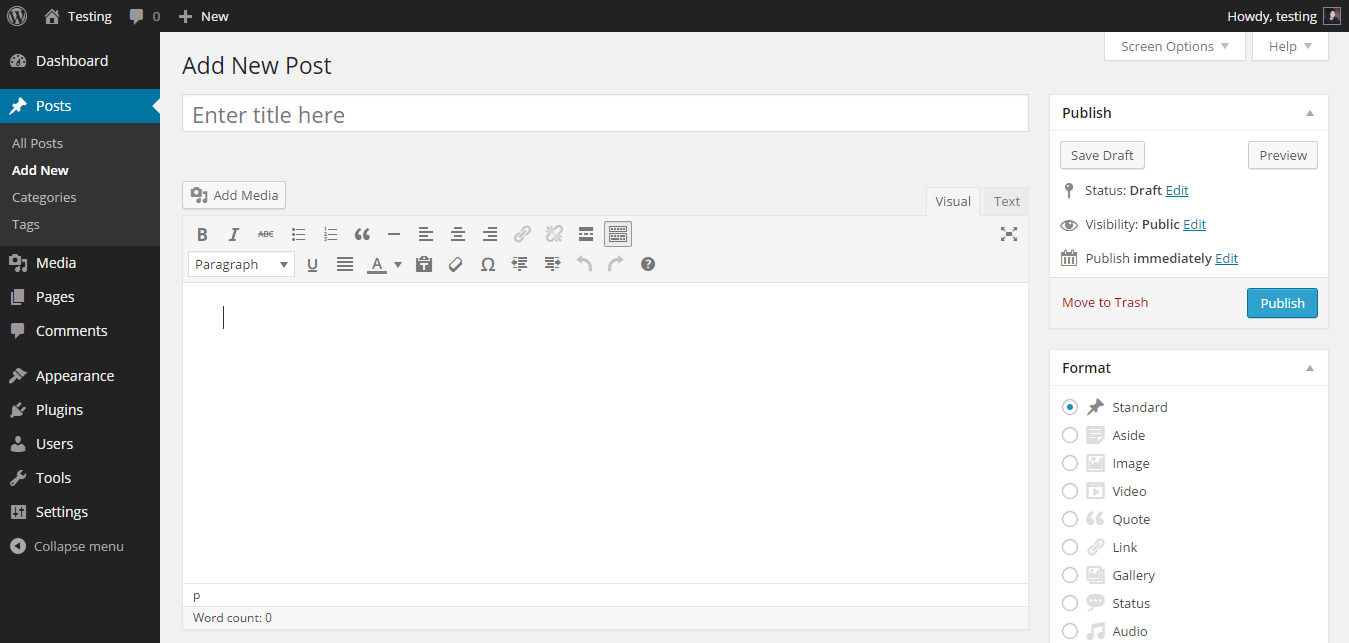
Step 6: Create your first post.
Click on the Posts tab on the left side, and then on Add New.
Now, brag about how proud you are about creating your first website on your own, and write anything that you want to share with your readers.
When the post is ready, just hit “Publish”. Your post is on-air! How exciting! You’ll see the link to this post from the homepage of your website. (Or press on “view post” from the WordPress dashboard webpage).
From now on, you can create everything and anything. Explore all the settings and learn about them; the possibilities are endless. You can do anything, and create the most interesting blog ever.
That’s it.
This is pretty much it. If you’ve really done everything that is written above, you really deserve a break, and a cookie. Be proud, because you’ve achieved something most people are afraid of even trying, and now you can honestly see that WordPress installation is not that hard.
Running a website and setting it up was one of the hardest jobs only a few years ago, but with the advance of hosting solutions and easy-to-manage platforms like WordPress, it is an extremely straightforward process that everyone can achieve.
Have more questions? Something isn’t clear? Write it down here in the comments, and I’ll make sure to clear things up.
*Note: We are Bluehost affiliate, which means the company pays us a small commission every time someone signs up. But this didn’t influence my recommendation, because all hosting services have similar programs. I chose to recommend Bluehost because I’m using it myself, and I honestly believe they offer the best hosting available. I wanted you to know that fact, since I believe being honest and fair is the way to go. Many people ask me “How do you setup a WordPress website?” – or even want to pay me to do that. So I came up with this guide, and I hope it can save you some money.
Super!
Good stuff is on the way.
Oops! Something went wrong while submitting the form :(
